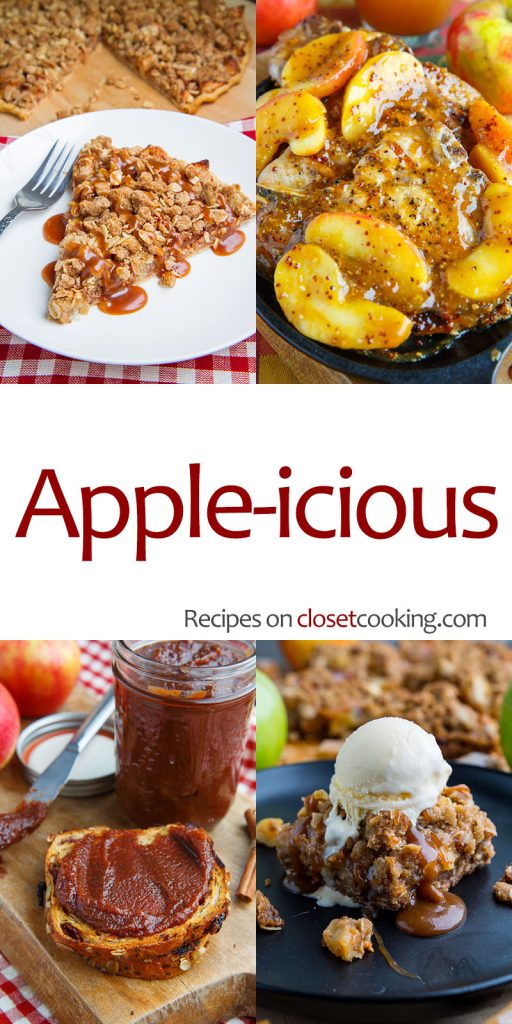
Tasty Dishes Highlighting Apples
**The Top, Most Apple-tastic Recipes for a Quick and Simple Autumn Delight**
Autumn is synonymous with the apple harvest, a time when these crisp, succulent fruits are at their finest. Apples are not only ideal for snacking but also remarkably flexible in the kitchen. Whether you’re in the mood for something sweet or savory, apples can elevate any dish with their distinctive mix of tartness and sweetness. Here are some quick and simple apple-tastic recipes to savor this autumn:
**1. Apple and Cheddar Salad**
Mix fresh chopped apples with mixed greens, sharp cheddar cheese, walnuts, and a splash of balsamic vinaigrette. This salad delivers a wonderful contrast of textures and flavors, making it an ideal appetizer or light meal.
**2. Traditional Apple Pie**
Nothing compares to the scent of a freshly baked apple pie. Utilize a combination of tart and sweet apples, like Granny Smith and Honeycrisp, for a well-rounded filling. Include cinnamon and nutmeg for warmth, and bake in a flaky crust for a classic dessert.
**3. Apple Cinnamon Oatmeal**
Kick off your day with a soothing bowl of apple cinnamon oatmeal. Cook oats with diced apples, a dash of cinnamon, and a hint of brown sugar. Garnish with a handful of nuts or a spoonful of yogurt for extra creaminess.
**4. Savory Apple and Butternut Squash Soup**
Puree roasted apples and butternut squash with vegetable broth, onion, and a touch of sage for a creamy, savory soup. This dish is perfect for a snug autumn night and goes well with crusty bread.
**5. Apple and Brie Sandwich**
Stack thin slices of apple and creamy Brie cheese on a baguette. Add a handful of arugula and a drizzle of honey mustard for a gourmet sandwich that’s ready in no time.
**6. Apple Crumble**
For a quick dessert, consider an apple crumble. Toss apple slices with sugar and cinnamon, and top with a blend of oats, flour, butter, and brown sugar, then bake until golden. Serve warm with vanilla ice cream for a comforting indulgence.
**7. Homemade Apple Cider**
Simmer apple slices with cinnamon sticks, cloves, and a little orange peel in water. Strain the blend for a fragrant apple cider that’s perfect for enjoying on a chilly day.
**8. Apple Quiche**
Integrate apples into a savory quiche by mixing them with caramelized onions, Gruyère cheese, and eggs. Bake in a pastry shell for a delightful brunch or dinner choice.
**9. Apple Muffins**
Prepare a batch of apple muffins by mixing diced apples into a spiced batter. These muffins are perfect for breakfast on the run or as a midday treat.
**10. Fresh Apple Sauce**
Create your own apple sauce by cooking peeled and diced apples with a splash of water and a pinch of cinnamon. Mash or blend to your preferred consistency for a homemade delight that’s suitable for all ages.
With these recipes, you can relish the essence of apple season in an array of tasty ways. Whether crafting a sweet dessert or a savory dish, apples bring a sprinkle of autumn magic to every meal.
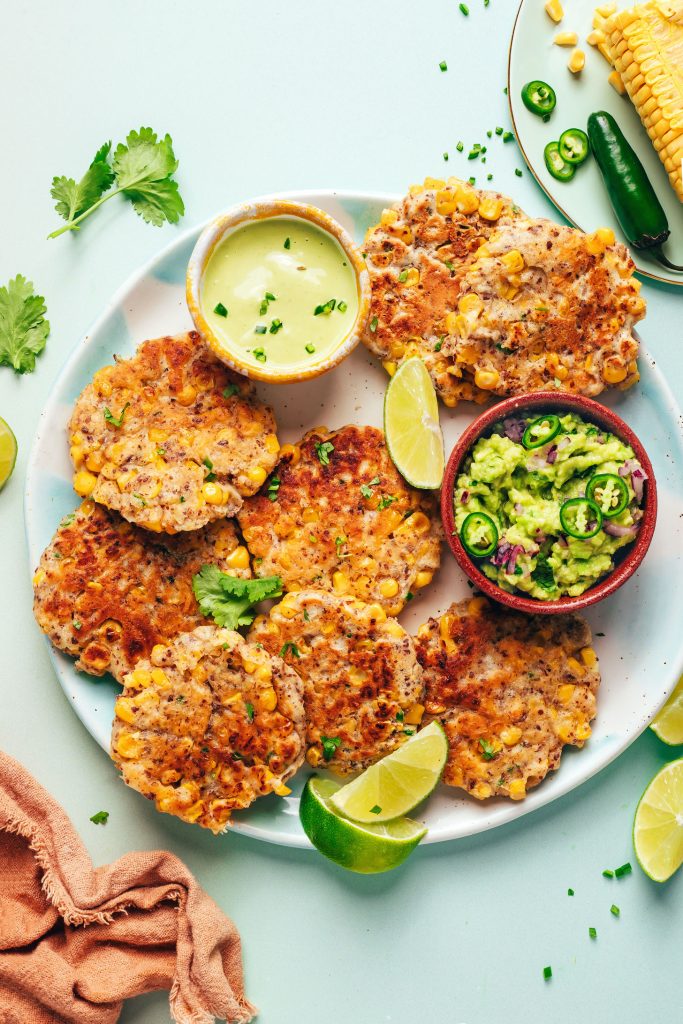
Vegan Corn Fritters with Jalapeño Recipe
# Vegan Corn Fritters: An Irresistible Summer Delight
Just when we believed summer’s ultimate vegetable couldn’t get any tastier, corn fritters appeared to delight our taste buds. These crunchy-on-the-outside, soft-on-the-inside, gently spiced fritters are an essential appetizer or side dish!
Not only are they extremely tasty, but these fritters are also vegan, optionally gluten-free, and SUPER simple to prepare! Grab your mixing bowl and 10 essential ingredients, and you’ll be savoring fritters in 30 minutes or less. What are you waiting for? Let’s get started!
## How to Create Vegan Corn Fritters
Transforming traditional corn fritters for a vegan audience involves a few tweaks. First, instead of eggs for binding, we utilize flaxseed meal. And we replace milk with a neutral, unsweetened dairy-free milk (homemade cashew is our favorite choice). The remaining ingredients are classic, but we added our own flavor twist and made them gluten-free!
In addition to flaxseed meal and dairy-free milk, the batter’s ingredients comprise baking powder for fluffiness; salt, garlic powder, and nutritional yeast for taste; and all-purpose flour or gluten-free blend to thicken it.
You’re aiming for a thick, fluffy batter, which can be accomplished by incorporating more flour or dairy-free milk as required. With the batter prepared, we’re just three ingredients away from fritter goodness!
Next, fresh corn is folded into the chunky batter, along with finely diced jalapeño for a gentle kick. While we adore using fresh ingredients during summer, this recipe also works well with frozen corn — just allow it to thaw at room temperature, then pat dry with paper towels to remove excess moisture. If fresh jalapeño isn’t available, a dash of cayenne would likely suffice!
Now it’s time to fry! Instead of deep frying, we opt for shallow frying, cooking for 2-3 minutes per side in avocado oil in a cast iron skillet. Not only do we find shallow frying less intimidating, but it decreases the amount of oil needed and maximizes health benefits. Win, win, win! And still, utterly delicious!
When the fritters turn golden on both sides, it’s time to dig in! They’re incredibly tasty alone, but they’re also fantastic when paired with a sauce. Try our Go-To Guacamole, Creamy Cashew Jalapeño Sauce, or Easy Vegan Ranch Dressing.
We hope you ADORE these corn fritters! They’re:
– Savory
– Crunchy
– Naturally slightly sweet
– Just a touch spicy
– Quick & simple
– SO delectable!
This is the ideal appetizer or side to whip up during peak summer when fresh corn and jalapeños are in abundance! However, they are so scrumptious you might find yourself wanting them all year long (in which case, frozen corn is also a superb alternative).
## What to Pair with Corn Fritters
These fritters are packed with flavor without being heavily spiced, making them a perfect match for various other sides and mains, especially grilled proteins, side salads, and anything BBQ flavored. Here are some delightful pairings:
– Grilled vegetables
– Fresh side salads
– BBQ tofu or tempeh
– Dipping sauces like guacamole or ranch
## More Fresh Corn Recipes
If you give this recipe a go, let us know! Leave a comment, rate it, and don’t forget to tag a picture on Instagram. Enjoy!
### Recipe: Vegan Corn Fritters
**Prep Time:** 10 minutes
**Cook Time:** 20 minutes
**Total Time:** 30 minutes
**Servings:** 8 fritters
**Course:** Appetizer, Side
**Cuisine:** Dairy-Free, Gluten-Free (optional), Vegan
**Freezer Friendly:** Best enjoyed fresh
**Does it keep?** 2 Days
#### Ingredients
– 2 Tbsp flaxseed meal
– 1/2 cup dairy-free milk (homemade cashew milk preferred)
– 1 Tbsp nutritional yeast
– 1 tsp baking powder
– 1/2 tsp sea salt
– 1/4 tsp garlic powder
– 1/2 cup gluten-free flour blend (or all-purpose flour)
– 1 ½ cups corn kernels (fresh or thawed from frozen)
– 1-2 Tbsp finely chopped jalapeño (to taste)
– Avocado oil (for frying)
#### Instructions
1. Prepare a baking sheet by layering paper towels on it and placing a cooling rack upside down on top of them.
2. In a large mixing bowl, combine flaxseed meal and dairy-free milk. Allow this to sit for 5 minutes.
3. After 5 minutes, incorporate the nutritional yeast, baking powder, sea salt, and garlic powder into
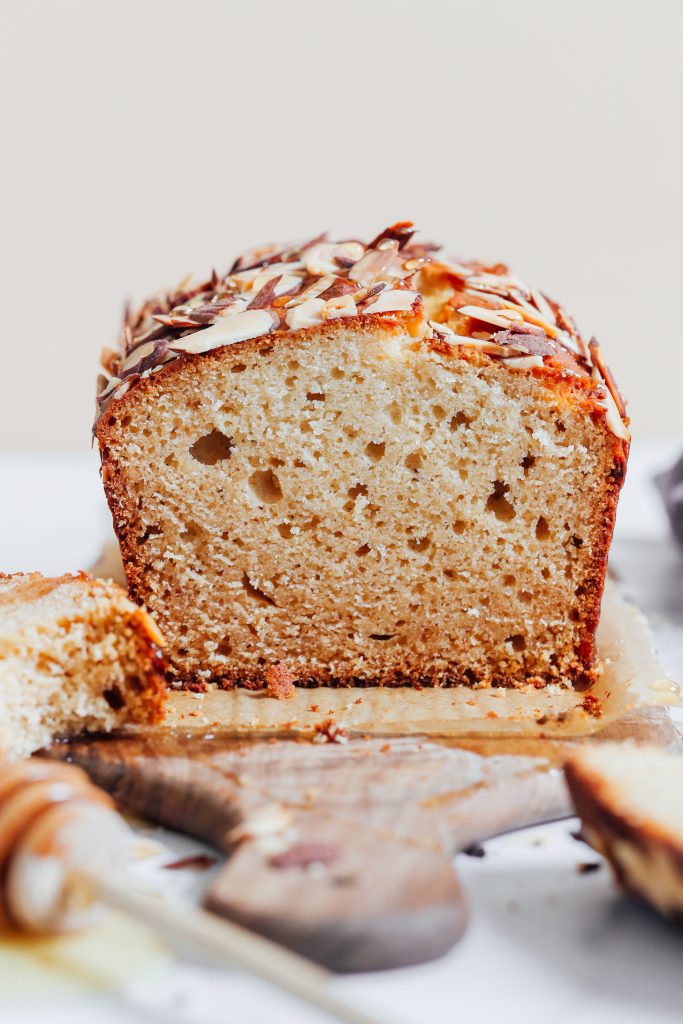
Gluten-Free Honey Almond Snack Cake Prepared in a Single Bowl
# Honey Almond Snack Cake: A Gluten-Free Delight
Honey almond snack cake is a charming dessert that merges the rich tastes of honey and almonds into a tender, airy loaf. This cake is not just visually striking but also accommodates those with dietary limitations, as it is crafted without gluten or dairy. With merely 10 ingredients and an uncomplicated preparation method, this cake is ideal for any event, whether it’s an afternoon tea or a brunch celebration.
## Ingredients Overview
The honey almond cake is created using the following essential ingredients:
1. **Almond Flour and Almond Extract**: These deliver the main almond essence. Almond flour lends a light, fluffy texture, while sliced almonds provide a crunchy finish.
2. **Gluten-Free Flour Blend**: A dependable gluten-free all-purpose flour blend enhances the almond flour, ensuring the cake maintains the appropriate structure. For those who aren’t gluten-sensitive, all-purpose flour may be used as a replacement.
3. **Honey**: This natural sweetener imparts a rich taste and keeps the cake moist, making it decadent yet appropriate for snacking.
4. **Eggs**: They assist in achieving maximum lightness and structure. For an eggless alternative, applesauce or aquafaba may be used, although the texture could vary.
5. **Dairy-Free Butter and Coconut Yogurt**: These components contribute to the richness and moisture. Conventional dairy items can be swapped if desired.
6. **Baking Powder and Sea Salt**: Crucial for the cake’s rise and flavor equilibrium.
## Baking Instructions
### Preparation Steps
1. **Preheat the Oven**: Adjust your oven to 350°F (176°C) and line an 8 x 4-inch loaf pan with parchment paper.
2. **Mix Wet Ingredients**: In a medium bowl, blend softened dairy-free butter and honey until lightened and well integrated. Incorporate eggs, dairy-free yogurt, and almond extract, whisking thoroughly.
3. **Combine Dry Ingredients**: Introduce the gluten-free flour blend, almond flour, baking powder, and sea salt into the wet mixture. Whisk until just integrated.
4. **Bake**: Transfer the batter into the arranged loaf pan and top with sliced almonds. Bake for 45-50 minutes, or until a toothpick inserted comes out with a few crumbs.
5. **Cool and Serve**: Let the cake cool for 10 minutes in the pan before moving it to a wire rack to cool completely. Serve at room temperature, optionally drizzled with honey.
### Storage
Remaining cake can be stored at room temperature for 3-4 days. It can also be sliced and frozen with parchment paper between pieces to avoid sticking. To thaw, place it in the refrigerator overnight or at room temperature for a few hours.
## Nutritional Information
Each slice of honey almond snack cake contains approximately:
– **Calories**: 245
– **Carbohydrates**: 33.7 g
– **Protein**: 3.7 g
– **Fat**: 11.8 g
– **Saturated Fat**: 5.7 g
– **Cholesterol**: 31 mg
– **Sodium**: 180 mg
– **Fiber**: 1.7 g
– **Sugar**: 17.9 g
This cake is not only scrumptious but also a healthier choice for those seeking gluten-free and dairy-free desserts.
## Conclusion
The honey almond snack cake is a flexible and delightful treat that everyone can relish, regardless of dietary constraints. Its airy texture and subtly sweet taste make it a perfect complement for coffee or tea. Whether you’re hosting a gathering or merely treating yourself, this cake is sure to impress. Enjoy a slice and relish the delightful fusion of honey and almonds!
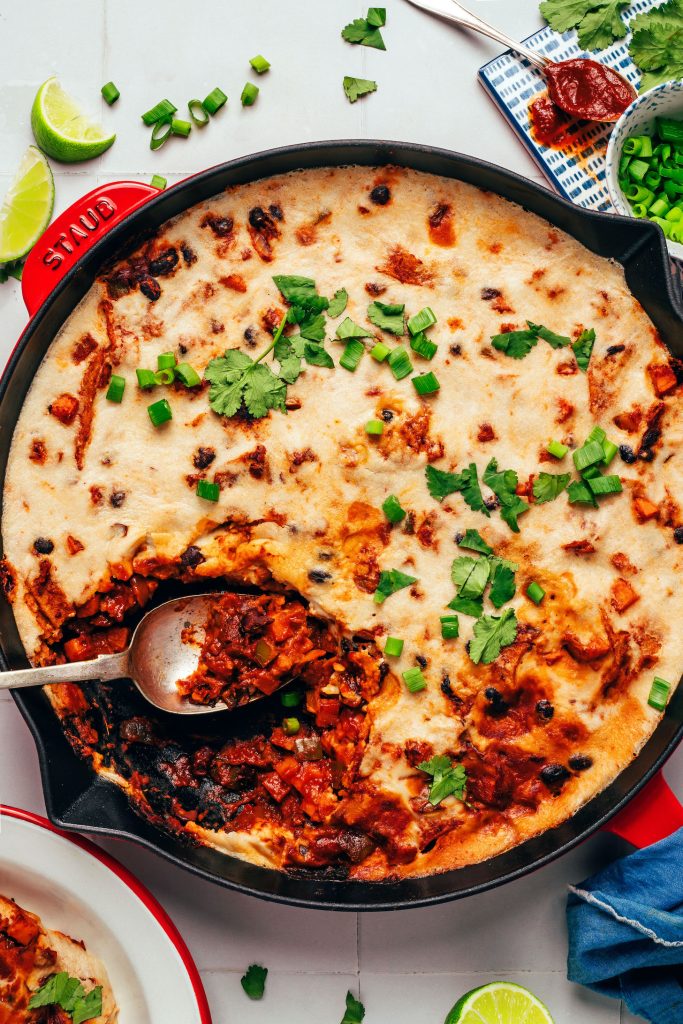
Speedy Cheesy Vegan Enchilada Skillet Recipe Prepared in 30 Minutes
# Cheesy Vegan Enchilada Skillet: A Quick and Flavorful Meal
Everything you adore about enchiladas, without the hassle! This incredibly tasty, cheesy vegan enchilada skillet assembles in roughly **30 minutes** with straightforward techniques, minimal dishes, and no requirement to stuff or roll tortillas.
This simple, healthful meal highlights soft cubed sweet potato or winter squash, fiber- & protein-packed black beans, and a luscious red enchilada sauce. Everything simmers in one pan and is crowned with a gooey cashew “cheese” that renders it SUPER satisfying and delightful!
## History of Enchiladas
It’s [thought](https://www.britannica.com/topic/enchilada) that enchiladas could have stemmed from a similar Mayan dish referred to as papadzules. The first documented recipe for enchiladas appeared in an 1831 cookbook named *El Cocinero mexicano*. Generally, enchiladas consist of meat, seafood, beans, cheese, potatoes, or vegetables wrapped in corn tortillas and adorned with enchilada sauce.
Our “inspired-by” enchilada skillet captures all the tastes of traditional enchiladas, yet it’s vegan, and instead of rolling the fill into tortillas, we cut the tortillas and prepare everything together in one pan on the stovetop!
## How to Create a Black Bean Enchilada Skillet
This **1-pan**, **30-minute** vegan enchilada skillet initiates with **a foundation of sautéed vegetables** — onion, garlic, sweet potato, and poblano pepper. The veggies can be varied here, so don’t hesitate to mix it up! We enjoy using kabocha squash for a fall twist and have found that green bell peppers work nicely when poblanos are unavailable. We also believe butternut squash would be great, as well as greens like kale or spinach.
Once the onions are very soft and the squash and peppers are just starting to become tender, we mix in **black beans** + **corn tortillas** that have been sliced into strips.
Next is the final ingredient in the skillet part of this recipe (hello, simple + tasty!): [red enchilada sauce](https://minimalistbaker.com/easy-red-enchilada-sauce/). We appreciate the rich flavor of our homemade enchilada sauce (and often have it ready in the freezer), but this recipe also performs well with [store-bought enchilada sauce](https://www.amazon.com/Siete-Family-Foods-Sauce-Enchilada/dp/B0815GKVC4/?tag=minimalistbaker-20).
Lastly, it simply wouldn’t be enchiladas without: the CHEESE! More specifically, a **tasty cashew “cheese” sauce** inspired by our beloved [Cheesy Vegan Pizza Beans](https://minimalistbaker.com/cheesy-vegan-pizza-beans-30-minutes/). It’s created by blending cashews, water, lime juice, garlic, tapioca starch, and sea salt. When drizzled over the enchilada skillet and sealed with a lid, the heat and tapioca starch work their magic, forming a **gooey, cheesy** layer! Total *swoon*!
We strongly recommend trying the cashew “cheese” sauce, even if you’re not vegan or dairy-free! It’s super simple and elevates this dish to a whole new level. Nevertheless, this enchilada skillet is also scrumptious with shredded vegan or dairy cheese (like pepper jack).
We believe you’ll ADORE this recipe! It’s:
– Smoky
– Spicy
– Incredibly flavorful
– Satisfying
– Versatile
– Quick & easy to whip up
– & SO delicious!
This dish is hearty and fantastic as an independent quick meal for weeknights! It would also complement our [Smoky Shredded Tofu Taco “Meat”](https://minimalistbaker.com/smoky-shredded-tofu-taco-meat/) or [1-Pan Mexican Shredded Chicken](https://minimalistbaker.com/1-pan-mexican-shredded-chicken) for a higher-protein choice. Alternatively, for more veggies, enjoy it with our [Crunchy Jicama Slaw](https://minimalistbaker.com/crunchy-jicama-slaw-1-bowl/) or [Quick Citrusy Cabbage Slaw](https://minimalistbaker.com/quick-citrusy-cabbage-slaw-mayo-free/).
## Additional Enchilada-Inspired Recipes
If you give this recipe a try, let us know! Leave a comment, rate it, and make sure to tag a photo [@minimalistbaker](https://www.instagram.com/minimalistbaker/) on Instagram. Cheers, friends!
### Recipe: Cheesy Vegan

Halloween Beverages to Elevate Your Frightful Festivities
# Halloween Cocktails: Frightening Fluids for the Festivities
Halloween is a season for revelry, terror, and themed get-togethers, and what could be more fitting than a host of festive cocktails? Whether you’re throwing an extravagant Halloween bash or simply concocting beverages for friends, this compilation presents an assortment of Halloween cocktails that capture seasonal tastes and vivid hues. From eerie mixtures to timeless classics, there’s a drink to satisfy all preferences.
## Reasons to Love These Halloween Cocktails
– **Diversity**: An extensive array of Halloween-infused beverages lets you select the finest recipes for your event.
– **Seasonal Tastes**: Savor autumnal favorites such as caramel apple, bourbon, warming spices, cranberry, and mulled wine.
– **Vibrant Creations**: Cocktails exhibiting rich berry shades, bright orange citrus, purple botanicals, vivid green elements, plus dark coffee and chocolate notes are ideal for the Halloween vibe.
– **Varied Selections**: From margaritas and martinis to sangria and rum drinks, there’s a cocktail for every taste.
– **Warm and Icy Beverages**: Enjoy both chilled party refreshments and hot cocktails on those brisk October nights.
– **Personalizable**: Easily modify each drink with Halloween-themed garnishes, rims, and glassware.
## Halloween Cocktails to Experiment With
### Autumn Flavors
**1. Caramel Apple Martini**
– **Total Time**: 5 minutes
– Indulge in this tasty Caramel Apple Martini recipe that captures the essence of fall in a lively green cocktail! [Get The Recipe](https://thewanderlustkitchen.com/caramel-apple-martini/)
**2. Caramel Apple Bourbon Cocktail**
– **Total Time**: 3 days
– Experience the enchantment of fall in a glass with this charming mix of seasonal scents and flavors. [Get The Recipe](https://thewanderlustkitchen.com/caramel-apple-bourbon/)
**3. Caramel Apple Sangria**
– **Total Time**: 1 hour 15 minutes
– Autumn flavors shine in this invigorating Caramel Apple Sangria! [Get The Recipe](https://thewanderlustkitchen.com/caramel-apple-sangria/)
**4. Hot Buttered Rum**
– **Total Time**: 35 minutes
– This recipe provides warmth and joy, making your festive drinks simply delectable. [Get The Recipe](https://thewanderlustkitchen.com/3-steps-perfect-hot-buttered-rum-mix/)
### Red, Orange, and Purple Drinks
**5. Halloween Margarita**
– A lively, zesty cocktail with fresh orange juice, cranberry juice, tequila, lime, and Cointreau. [Get The Recipe](https://thewanderlustkitchen.com/halloween-margarita/)
**6. Vampire’s Kiss Cocktail**
– A fruity, effervescent beverage crafted with vodka, cranberry juice cocktail, raspberry liqueur, and sparkling wine. [Get The Recipe](https://thewanderlustkitchen.com/vampires-kiss-cocktail/)
**7. Blood Orange Margarita**
– Jump into this zesty Blood Orange Margarita recipe for a vibrant cocktail! [Get The Recipe](https://thewanderlustkitchen.com/blood-orange-margarita/)
### Green, Dark, and Spectral Cocktails
**8. Sour Apple Martini**
– A traditional cocktail bursting with color that will tease your taste buds! [Get The Recipe](https://thewanderlustkitchen.com/sour-apple-martini/)
**9. Espresso Martini**
– A seamless mix of espresso, vodka, and Kahlúa for a delightful cocktail experience. [Get The Recipe](https://thewanderlustkitchen.com/espresso-martini/)
**10. Baileys Chocolate Martini**
– A creamy, chocolate-filled drink that will fulfill your cravings for sweetness. [Get The Recipe](https://thewanderlustkitchen.com/baileys-chocolate-martini/)
## Tips to Make Any Cocktail Halloween-Ready
Elevate any cocktail into a Halloween treat by concentrating on color and presentation. Here are some suggestions:
### Select a Halloween Color Scheme
– **Orange**: Incorporate orange juice or amber spirits.
– **Red**: Use blood orange, cranberry, or raspberry.
– **Purple**: Opt for lavender or blueberry.
– **Green**: Include components such as sour apple or cucumber.
– **Dark Brown/Black**: Utilize espresso or chocolate.
– **White**: Coconut-based drinks can have a ghostly appeal.
### Ideas for Halloween Cocktail Rims and Garnishes
– **Rim Choices**: Use black or orange sanding sugar, cinnamon sugar, or Tajín for a festive flair.
– **Garnishing**: Fresh fruits, herbs, and themed picks can elevate the drink’s look.
### Halloween Glassware and Ice Suggestions
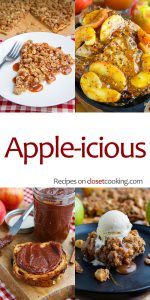
Tasty Dishes Highlighting Apples
**The Top, Most Apple-tastic Recipes for a Quick and Simple Autumn Delight**
Autumn is synonymous with the apple harvest, a time when these crisp, succulent fruits are at their finest. Apples are not only ideal for snacking but also remarkably flexible in the kitchen. Whether you’re in the mood for something sweet or savory, apples can elevate any dish with their distinctive mix of tartness and sweetness. Here are some quick and simple apple-tastic recipes to savor this autumn:
**1. Apple and Cheddar Salad**
Mix fresh chopped apples with mixed greens, sharp cheddar cheese, walnuts, and a splash of balsamic vinaigrette. This salad delivers a wonderful contrast of textures and flavors, making it an ideal appetizer or light meal.
**2. Traditional Apple Pie**
Nothing compares to the scent of a freshly baked apple pie. Utilize a combination of tart and sweet apples, like Granny Smith and Honeycrisp, for a well-rounded filling. Include cinnamon and nutmeg for warmth, and bake in a flaky crust for a classic dessert.
**3. Apple Cinnamon Oatmeal**
Kick off your day with a soothing bowl of apple cinnamon oatmeal. Cook oats with diced apples, a dash of cinnamon, and a hint of brown sugar. Garnish with a handful of nuts or a spoonful of yogurt for extra creaminess.
**4. Savory Apple and Butternut Squash Soup**
Puree roasted apples and butternut squash with vegetable broth, onion, and a touch of sage for a creamy, savory soup. This dish is perfect for a snug autumn night and goes well with crusty bread.
**5. Apple and Brie Sandwich**
Stack thin slices of apple and creamy Brie cheese on a baguette. Add a handful of arugula and a drizzle of honey mustard for a gourmet sandwich that’s ready in no time.
**6. Apple Crumble**
For a quick dessert, consider an apple crumble. Toss apple slices with sugar and cinnamon, and top with a blend of oats, flour, butter, and brown sugar, then bake until golden. Serve warm with vanilla ice cream for a comforting indulgence.
**7. Homemade Apple Cider**
Simmer apple slices with cinnamon sticks, cloves, and a little orange peel in water. Strain the blend for a fragrant apple cider that’s perfect for enjoying on a chilly day.
**8. Apple Quiche**
Integrate apples into a savory quiche by mixing them with caramelized onions, Gruyère cheese, and eggs. Bake in a pastry shell for a delightful brunch or dinner choice.
**9. Apple Muffins**
Prepare a batch of apple muffins by mixing diced apples into a spiced batter. These muffins are perfect for breakfast on the run or as a midday treat.
**10. Fresh Apple Sauce**
Create your own apple sauce by cooking peeled and diced apples with a splash of water and a pinch of cinnamon. Mash or blend to your preferred consistency for a homemade delight that’s suitable for all ages.
With these recipes, you can relish the essence of apple season in an array of tasty ways. Whether crafting a sweet dessert or a savory dish, apples bring a sprinkle of autumn magic to every meal.
Read More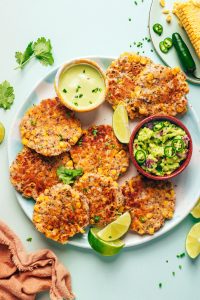
Vegan Corn Fritters with Jalapeño Recipe
# Vegan Corn Fritters: An Irresistible Summer Delight
Just when we believed summer’s ultimate vegetable couldn’t get any tastier, corn fritters appeared to delight our taste buds. These crunchy-on-the-outside, soft-on-the-inside, gently spiced fritters are an essential appetizer or side dish!
Not only are they extremely tasty, but these fritters are also vegan, optionally gluten-free, and SUPER simple to prepare! Grab your mixing bowl and 10 essential ingredients, and you’ll be savoring fritters in 30 minutes or less. What are you waiting for? Let’s get started!
## How to Create Vegan Corn Fritters
Transforming traditional corn fritters for a vegan audience involves a few tweaks. First, instead of eggs for binding, we utilize flaxseed meal. And we replace milk with a neutral, unsweetened dairy-free milk (homemade cashew is our favorite choice). The remaining ingredients are classic, but we added our own flavor twist and made them gluten-free!
In addition to flaxseed meal and dairy-free milk, the batter’s ingredients comprise baking powder for fluffiness; salt, garlic powder, and nutritional yeast for taste; and all-purpose flour or gluten-free blend to thicken it.
You’re aiming for a thick, fluffy batter, which can be accomplished by incorporating more flour or dairy-free milk as required. With the batter prepared, we’re just three ingredients away from fritter goodness!
Next, fresh corn is folded into the chunky batter, along with finely diced jalapeño for a gentle kick. While we adore using fresh ingredients during summer, this recipe also works well with frozen corn — just allow it to thaw at room temperature, then pat dry with paper towels to remove excess moisture. If fresh jalapeño isn’t available, a dash of cayenne would likely suffice!
Now it’s time to fry! Instead of deep frying, we opt for shallow frying, cooking for 2-3 minutes per side in avocado oil in a cast iron skillet. Not only do we find shallow frying less intimidating, but it decreases the amount of oil needed and maximizes health benefits. Win, win, win! And still, utterly delicious!
When the fritters turn golden on both sides, it’s time to dig in! They’re incredibly tasty alone, but they’re also fantastic when paired with a sauce. Try our Go-To Guacamole, Creamy Cashew Jalapeño Sauce, or Easy Vegan Ranch Dressing.
We hope you ADORE these corn fritters! They’re:
– Savory
– Crunchy
– Naturally slightly sweet
– Just a touch spicy
– Quick & simple
– SO delectable!
This is the ideal appetizer or side to whip up during peak summer when fresh corn and jalapeños are in abundance! However, they are so scrumptious you might find yourself wanting them all year long (in which case, frozen corn is also a superb alternative).
## What to Pair with Corn Fritters
These fritters are packed with flavor without being heavily spiced, making them a perfect match for various other sides and mains, especially grilled proteins, side salads, and anything BBQ flavored. Here are some delightful pairings:
– Grilled vegetables
– Fresh side salads
– BBQ tofu or tempeh
– Dipping sauces like guacamole or ranch
## More Fresh Corn Recipes
If you give this recipe a go, let us know! Leave a comment, rate it, and don’t forget to tag a picture on Instagram. Enjoy!
### Recipe: Vegan Corn Fritters
**Prep Time:** 10 minutes
**Cook Time:** 20 minutes
**Total Time:** 30 minutes
**Servings:** 8 fritters
**Course:** Appetizer, Side
**Cuisine:** Dairy-Free, Gluten-Free (optional), Vegan
**Freezer Friendly:** Best enjoyed fresh
**Does it keep?** 2 Days
#### Ingredients
– 2 Tbsp flaxseed meal
– 1/2 cup dairy-free milk (homemade cashew milk preferred)
– 1 Tbsp nutritional yeast
– 1 tsp baking powder
– 1/2 tsp sea salt
– 1/4 tsp garlic powder
– 1/2 cup gluten-free flour blend (or all-purpose flour)
– 1 ½ cups corn kernels (fresh or thawed from frozen)
– 1-2 Tbsp finely chopped jalapeño (to taste)
– Avocado oil (for frying)
#### Instructions
1. Prepare a baking sheet by layering paper towels on it and placing a cooling rack upside down on top of them.
2. In a large mixing bowl, combine flaxseed meal and dairy-free milk. Allow this to sit for 5 minutes.
3. After 5 minutes, incorporate the nutritional yeast, baking powder, sea salt, and garlic powder into
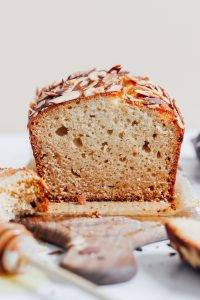
Gluten-Free Honey Almond Snack Cake Prepared in a Single Bowl
# Honey Almond Snack Cake: A Gluten-Free Delight
Honey almond snack cake is a charming dessert that merges the rich tastes of honey and almonds into a tender, airy loaf. This cake is not just visually striking but also accommodates those with dietary limitations, as it is crafted without gluten or dairy. With merely 10 ingredients and an uncomplicated preparation method, this cake is ideal for any event, whether it’s an afternoon tea or a brunch celebration.
## Ingredients Overview
The honey almond cake is created using the following essential ingredients:
1. **Almond Flour and Almond Extract**: These deliver the main almond essence. Almond flour lends a light, fluffy texture, while sliced almonds provide a crunchy finish.
2. **Gluten-Free Flour Blend**: A dependable gluten-free all-purpose flour blend enhances the almond flour, ensuring the cake maintains the appropriate structure. For those who aren’t gluten-sensitive, all-purpose flour may be used as a replacement.
3. **Honey**: This natural sweetener imparts a rich taste and keeps the cake moist, making it decadent yet appropriate for snacking.
4. **Eggs**: They assist in achieving maximum lightness and structure. For an eggless alternative, applesauce or aquafaba may be used, although the texture could vary.
5. **Dairy-Free Butter and Coconut Yogurt**: These components contribute to the richness and moisture. Conventional dairy items can be swapped if desired.
6. **Baking Powder and Sea Salt**: Crucial for the cake’s rise and flavor equilibrium.
## Baking Instructions
### Preparation Steps
1. **Preheat the Oven**: Adjust your oven to 350°F (176°C) and line an 8 x 4-inch loaf pan with parchment paper.
2. **Mix Wet Ingredients**: In a medium bowl, blend softened dairy-free butter and honey until lightened and well integrated. Incorporate eggs, dairy-free yogurt, and almond extract, whisking thoroughly.
3. **Combine Dry Ingredients**: Introduce the gluten-free flour blend, almond flour, baking powder, and sea salt into the wet mixture. Whisk until just integrated.
4. **Bake**: Transfer the batter into the arranged loaf pan and top with sliced almonds. Bake for 45-50 minutes, or until a toothpick inserted comes out with a few crumbs.
5. **Cool and Serve**: Let the cake cool for 10 minutes in the pan before moving it to a wire rack to cool completely. Serve at room temperature, optionally drizzled with honey.
### Storage
Remaining cake can be stored at room temperature for 3-4 days. It can also be sliced and frozen with parchment paper between pieces to avoid sticking. To thaw, place it in the refrigerator overnight or at room temperature for a few hours.
## Nutritional Information
Each slice of honey almond snack cake contains approximately:
– **Calories**: 245
– **Carbohydrates**: 33.7 g
– **Protein**: 3.7 g
– **Fat**: 11.8 g
– **Saturated Fat**: 5.7 g
– **Cholesterol**: 31 mg
– **Sodium**: 180 mg
– **Fiber**: 1.7 g
– **Sugar**: 17.9 g
This cake is not only scrumptious but also a healthier choice for those seeking gluten-free and dairy-free desserts.
## Conclusion
The honey almond snack cake is a flexible and delightful treat that everyone can relish, regardless of dietary constraints. Its airy texture and subtly sweet taste make it a perfect complement for coffee or tea. Whether you’re hosting a gathering or merely treating yourself, this cake is sure to impress. Enjoy a slice and relish the delightful fusion of honey and almonds!
Read More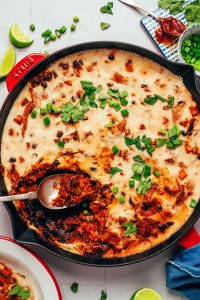
Speedy Cheesy Vegan Enchilada Skillet Recipe Prepared in 30 Minutes
# Cheesy Vegan Enchilada Skillet: A Quick and Flavorful Meal
Everything you adore about enchiladas, without the hassle! This incredibly tasty, cheesy vegan enchilada skillet assembles in roughly **30 minutes** with straightforward techniques, minimal dishes, and no requirement to stuff or roll tortillas.
This simple, healthful meal highlights soft cubed sweet potato or winter squash, fiber- & protein-packed black beans, and a luscious red enchilada sauce. Everything simmers in one pan and is crowned with a gooey cashew “cheese” that renders it SUPER satisfying and delightful!
## History of Enchiladas
It’s [thought](https://www.britannica.com/topic/enchilada) that enchiladas could have stemmed from a similar Mayan dish referred to as papadzules. The first documented recipe for enchiladas appeared in an 1831 cookbook named *El Cocinero mexicano*. Generally, enchiladas consist of meat, seafood, beans, cheese, potatoes, or vegetables wrapped in corn tortillas and adorned with enchilada sauce.
Our “inspired-by” enchilada skillet captures all the tastes of traditional enchiladas, yet it’s vegan, and instead of rolling the fill into tortillas, we cut the tortillas and prepare everything together in one pan on the stovetop!
## How to Create a Black Bean Enchilada Skillet
This **1-pan**, **30-minute** vegan enchilada skillet initiates with **a foundation of sautéed vegetables** — onion, garlic, sweet potato, and poblano pepper. The veggies can be varied here, so don’t hesitate to mix it up! We enjoy using kabocha squash for a fall twist and have found that green bell peppers work nicely when poblanos are unavailable. We also believe butternut squash would be great, as well as greens like kale or spinach.
Once the onions are very soft and the squash and peppers are just starting to become tender, we mix in **black beans** + **corn tortillas** that have been sliced into strips.
Next is the final ingredient in the skillet part of this recipe (hello, simple + tasty!): [red enchilada sauce](https://minimalistbaker.com/easy-red-enchilada-sauce/). We appreciate the rich flavor of our homemade enchilada sauce (and often have it ready in the freezer), but this recipe also performs well with [store-bought enchilada sauce](https://www.amazon.com/Siete-Family-Foods-Sauce-Enchilada/dp/B0815GKVC4/?tag=minimalistbaker-20).
Lastly, it simply wouldn’t be enchiladas without: the CHEESE! More specifically, a **tasty cashew “cheese” sauce** inspired by our beloved [Cheesy Vegan Pizza Beans](https://minimalistbaker.com/cheesy-vegan-pizza-beans-30-minutes/). It’s created by blending cashews, water, lime juice, garlic, tapioca starch, and sea salt. When drizzled over the enchilada skillet and sealed with a lid, the heat and tapioca starch work their magic, forming a **gooey, cheesy** layer! Total *swoon*!
We strongly recommend trying the cashew “cheese” sauce, even if you’re not vegan or dairy-free! It’s super simple and elevates this dish to a whole new level. Nevertheless, this enchilada skillet is also scrumptious with shredded vegan or dairy cheese (like pepper jack).
We believe you’ll ADORE this recipe! It’s:
– Smoky
– Spicy
– Incredibly flavorful
– Satisfying
– Versatile
– Quick & easy to whip up
– & SO delicious!
This dish is hearty and fantastic as an independent quick meal for weeknights! It would also complement our [Smoky Shredded Tofu Taco “Meat”](https://minimalistbaker.com/smoky-shredded-tofu-taco-meat/) or [1-Pan Mexican Shredded Chicken](https://minimalistbaker.com/1-pan-mexican-shredded-chicken) for a higher-protein choice. Alternatively, for more veggies, enjoy it with our [Crunchy Jicama Slaw](https://minimalistbaker.com/crunchy-jicama-slaw-1-bowl/) or [Quick Citrusy Cabbage Slaw](https://minimalistbaker.com/quick-citrusy-cabbage-slaw-mayo-free/).
## Additional Enchilada-Inspired Recipes
If you give this recipe a try, let us know! Leave a comment, rate it, and make sure to tag a photo [@minimalistbaker](https://www.instagram.com/minimalistbaker/) on Instagram. Cheers, friends!
### Recipe: Cheesy Vegan
Read More
Halloween Beverages to Elevate Your Frightful Festivities
# Halloween Cocktails: Frightening Fluids for the Festivities
Halloween is a season for revelry, terror, and themed get-togethers, and what could be more fitting than a host of festive cocktails? Whether you’re throwing an extravagant Halloween bash or simply concocting beverages for friends, this compilation presents an assortment of Halloween cocktails that capture seasonal tastes and vivid hues. From eerie mixtures to timeless classics, there’s a drink to satisfy all preferences.
## Reasons to Love These Halloween Cocktails
– **Diversity**: An extensive array of Halloween-infused beverages lets you select the finest recipes for your event.
– **Seasonal Tastes**: Savor autumnal favorites such as caramel apple, bourbon, warming spices, cranberry, and mulled wine.
– **Vibrant Creations**: Cocktails exhibiting rich berry shades, bright orange citrus, purple botanicals, vivid green elements, plus dark coffee and chocolate notes are ideal for the Halloween vibe.
– **Varied Selections**: From margaritas and martinis to sangria and rum drinks, there’s a cocktail for every taste.
– **Warm and Icy Beverages**: Enjoy both chilled party refreshments and hot cocktails on those brisk October nights.
– **Personalizable**: Easily modify each drink with Halloween-themed garnishes, rims, and glassware.
## Halloween Cocktails to Experiment With
### Autumn Flavors
**1. Caramel Apple Martini**
– **Total Time**: 5 minutes
– Indulge in this tasty Caramel Apple Martini recipe that captures the essence of fall in a lively green cocktail! [Get The Recipe](https://thewanderlustkitchen.com/caramel-apple-martini/)
**2. Caramel Apple Bourbon Cocktail**
– **Total Time**: 3 days
– Experience the enchantment of fall in a glass with this charming mix of seasonal scents and flavors. [Get The Recipe](https://thewanderlustkitchen.com/caramel-apple-bourbon/)
**3. Caramel Apple Sangria**
– **Total Time**: 1 hour 15 minutes
– Autumn flavors shine in this invigorating Caramel Apple Sangria! [Get The Recipe](https://thewanderlustkitchen.com/caramel-apple-sangria/)
**4. Hot Buttered Rum**
– **Total Time**: 35 minutes
– This recipe provides warmth and joy, making your festive drinks simply delectable. [Get The Recipe](https://thewanderlustkitchen.com/3-steps-perfect-hot-buttered-rum-mix/)
### Red, Orange, and Purple Drinks
**5. Halloween Margarita**
– A lively, zesty cocktail with fresh orange juice, cranberry juice, tequila, lime, and Cointreau. [Get The Recipe](https://thewanderlustkitchen.com/halloween-margarita/)
**6. Vampire’s Kiss Cocktail**
– A fruity, effervescent beverage crafted with vodka, cranberry juice cocktail, raspberry liqueur, and sparkling wine. [Get The Recipe](https://thewanderlustkitchen.com/vampires-kiss-cocktail/)
**7. Blood Orange Margarita**
– Jump into this zesty Blood Orange Margarita recipe for a vibrant cocktail! [Get The Recipe](https://thewanderlustkitchen.com/blood-orange-margarita/)
### Green, Dark, and Spectral Cocktails
**8. Sour Apple Martini**
– A traditional cocktail bursting with color that will tease your taste buds! [Get The Recipe](https://thewanderlustkitchen.com/sour-apple-martini/)
**9. Espresso Martini**
– A seamless mix of espresso, vodka, and Kahlúa for a delightful cocktail experience. [Get The Recipe](https://thewanderlustkitchen.com/espresso-martini/)
**10. Baileys Chocolate Martini**
– A creamy, chocolate-filled drink that will fulfill your cravings for sweetness. [Get The Recipe](https://thewanderlustkitchen.com/baileys-chocolate-martini/)
## Tips to Make Any Cocktail Halloween-Ready
Elevate any cocktail into a Halloween treat by concentrating on color and presentation. Here are some suggestions:
### Select a Halloween Color Scheme
– **Orange**: Incorporate orange juice or amber spirits.
– **Red**: Use blood orange, cranberry, or raspberry.
– **Purple**: Opt for lavender or blueberry.
– **Green**: Include components such as sour apple or cucumber.
– **Dark Brown/Black**: Utilize espresso or chocolate.
– **White**: Coconut-based drinks can have a ghostly appeal.
### Ideas for Halloween Cocktail Rims and Garnishes
– **Rim Choices**: Use black or orange sanding sugar, cinnamon sugar, or Tajín for a festive flair.
– **Garnishing**: Fresh fruits, herbs, and themed picks can elevate the drink’s look.
### Halloween Glassware and Ice Suggestions
Read More
Vampire’s Kiss Drink Recipe
# Vampire’s Kiss Cocktail: A Frighteningly Fruity Treat for Halloween
This **Vampire’s Kiss Cocktail** offers a delightful mix of fruity and effervescent tastes, making it a fantastic pick for Halloween celebrations. With its striking blood-red color, this cocktail is not only flavorful but also eye-catching, enhanced by the dramatic black sugar rim that contributes an eerie vibe. The blend of vodka, cranberry juice cocktail, raspberry liqueur, simple syrup, and sparkling wine results in a sweet and tangy beverage that will surely amaze your guests.
## Why You’ll Adore This Vampire’s Kiss Cocktail
– **Pure Base**: Utilizing plain vodka lets the inherent flavors of cranberry and raspberry come forward, steering clear of the excessive sweetness commonly found in other cocktails.
– **Effervescent Finish**: The inclusion of sparkling wine after shaking lends the cocktail a light, festive fizz that takes it up a notch from an ordinary vodka-cranberry drink.
– **Harmonized Sweetness**: A half ounce of simple syrup balances the tartness of the cranberry juice without depending on grenadine, keeping a clear and harmonious flavor profile.
– **Eerie Presentation**: The black sugar rim offers a Halloween-themed contrast without needing dry ice or synthetic colors, making it a straightforward yet impactful garnish.
– **Festive Accent**: Fresh cherries, raspberries, or cranberries on a Halloween-themed cocktail pick amplify the fruity notes and impart a celebratory flair to every glass.
## Recipe Ingredients
– **Vodka**: A neutral base that allows the fruity flavors to emerge.
– **Cranberry Juice Cocktail**: Contributes the deep red hue and tartness to the cocktail.
– **Raspberry Liqueur**: Infuses rich berry flavor and sweetness; Chambord is an excellent option.
– **Champagne or Sparkling Wine**: Adds fizz and a refreshing finish; choices include Champagne, Prosecco, or Cava.
– **Simple Syrup**: Balances the tartness of the cranberry juice.
## How to Create a Vampire’s Kiss Cocktail
1. **Prepare the Glass**: Place black sanding sugar on a small plate. Lightly wet the rim of a rocks, martini, or coupe glass with water, then dip the rim into the black sugar until entirely coated.
2. **Combine the Cocktail**: Fill a cocktail shaker with ice. Add vodka, cranberry juice cocktail, simple syrup, and raspberry liqueur. Shake vigorously for 20 to 30 seconds until well chilled.
3. **Strain and Top**: Pour the cocktail into the prepared glass. Gently top with 1 to 2 ounces of chilled Champagne or sparkling wine, based on your preference for bubbles.
4. **Garnish and Serve**: Thread fresh cherries, raspberries, or cranberries onto a Halloween-themed cocktail pick. Lay it across the glass and serve at once.
## Expert Advice
– **Keep the Sparkling Wine Chilled**: Ensuring the sparkling wine is cold helps maintain the cocktail’s temperature and retains its bubbles.
– **Avoid Shaking the Bubbles**: Shake the vodka mixture first, then add the sparkling wine directly into the glass to preserve carbonation.
– **Modify the Sparkling Wine Amount**: Start with 1 ounce for a more pronounced fruit flavor, or increase to 2 ounces for a lighter, fizzier drink.
– **Prepare the Rim First**: Rim the glass prior to mixing the cocktail to guarantee it can be served immediately without losing its chill.
## FAQs
– **Which raspberry liqueur is ideal?** Chambord is advised for its rich taste, but any high-quality raspberry liqueur will suffice.
– **What kind of sparkling wine should I utilize?** A dry or Brut Champagne, Prosecco, or Cava is perfect; drier choices counterbalance the cocktail’s sweetness.
– **Can I prepare this cocktail in advance?** Yes, combine the vodka, cranberry juice, raspberry liqueur, and simple syrup ahead of time and refrigerate. Add sparkling wine right before serving.
– **Is it possible to make a large batch for a gathering?** Definitely! Scale up the ingredients by the desired number of servings and refrigerate the mixture in a pitcher.
– **What can I use for garnish?** Fresh cherries, raspberries, or cranberries work well and enhance the cocktail’s profile.
## Storage Information
A finished Vampire’s Kiss Cocktail is best enjoyed immediately as the sparkling wine will lose its effervescence over time. However, the vodka, cranberry juice, raspberry liqueur, and simple syrup can be prepared and kept in a sealed container in the refrigerator for up to 1 to 2 days. Shake with ice and include sparkling wine right before serving.
Savor this delightful cocktail responsibly, and make your Halloween festivities unforgettable with the Vampire’s Kiss Cocktail!
Read More
Halloween-Inspired Margarita Recipe
# Halloween Margarita: A Chilling and Refreshing Cocktail
This Halloween Margarita is vibrant, zesty, and just eerie enough for October! Merging fresh orange juice, cranberry juice, tequila, lime, and Cointreau, this cocktail is not only eye-catching but also sweet and tangy. Topped with a striking black sugar rim and a fresh orange slice, it’s the ideal drink to honor the spooky season.
## Reasons You’ll Adore This Halloween Margarita
– **Cheerful Appearance**: The fresh orange and cranberry juices create a naturally vivid orange-red cocktail, making it visually stunning for Halloween parties.
– **Timeless Flavor**: Cointreau amplifies the orange essence, ensuring the drink stays authentic to its margarita heritage without adding any other flavors that might detract from its core.
– **Eerie Twist**: The black sugar rim introduces a playful Halloween touch while delivering a sweet crunch.
– **Swift Preparation**: Crafted in only five minutes using a straightforward cocktail shaker, this drink doesn’t necessitate complicated techniques or ingredients.
– **Well-Balanced Flavor**: The mix of fresh orange, tart cranberry, lime, tequila, and simple syrup culminates in a harmonious flavor that’s perfect for any Halloween celebration.
## Recipe Components
– **Fresh Orange Juice**: Delivers bright citrus flavor and festive hue.
– **Cranberry Juice Cocktail**: Contributes tartness and enriches the color.
– **Fresh Lime Juice**: Counterbalances sweetness with its tangy acidity.
– **Tequila**: Blanco or silver tequila provides a clean agave taste.
– **Cointreau**: This orange liqueur magnifies the citrus flavors and introduces sweetness.
## Steps to Create a Halloween Margarita
1. **Combine Ingredients**: Fill a cocktail shaker with ice and incorporate tequila, fresh orange juice, cranberry juice, Cointreau, fresh lime juice, and simple syrup.
2. **Shake**: Vigorously shake for about 20 to 30 seconds until the shaker feels extremely cold.
3. **Prepare Glass**: Run an orange slice around the rim of your cocktail glass, then dip the rim into black sugar. Fill the glass with ice.
4. **Serve**: Strain the margarita into the prepared glass, embellish with a fresh orange slice, and relish!
## Professional Tips
– **Opt for Fresh Juice**: Freshly squeezed orange juice elevates the cocktail’s taste.
– **Even Sugar Rim**: Rotate the moistened glass in black sanding sugar for a uniform rim.
– **Ensure Proper Chilling**: Shake until very cold for optimal taste and texture.
– **Garnish Right Before Serving**: Prepare the garnish just prior to serving to maintain its freshness.
## Common Questions
– **What tequila is ideal for a Halloween Margarita?**
Blanco or silver tequila is suggested for its clean profile, but reposado can also be used for a more intense flavor.
– **Can I prepare a frozen Halloween Margarita?**
Yes, blend the ingredients with ice for a frozen variant.
– **Can I replace Cointreau with something else?**
Triple sec can be utilized, or Grand Marnier for a deeper flavor.
– **Can I make these for a gathering?**
Absolutely, scale the ingredients for a pitcher and serve individual glasses.
– **Can I create a non-alcoholic variation?**
Exclude the tequila and Cointreau, substituting with extra orange juice and a splash of sparkling water.
## Storage Guidelines
This Halloween Margarita is best enjoyed freshly shaken. Nevertheless, the mixed cocktail can be stored in a sealed container in the refrigerator for up to 2 days. Shake or stir well before serving, and prepare the black sugar rim and orange slice just before serving.
## More Cocktail Recipes To Enjoy
Discover other fruity margaritas like Cranberry Margarita, Blueberry Margarita, and Blood Orange Margarita to keep the festive vibes alive!
Savor this Halloween Margarita responsibly and make your spooky festivities even more enjoyable!
Read More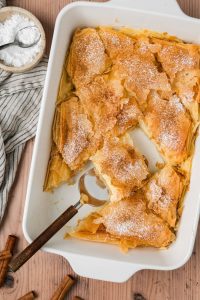
Bougatsa: An Authentic Greek Pastry Stuffed with Cream, Cheese, or Meat
# Bougatsa: An Experience of Greek Bakery Delight
Golden, flaky, and sprinkled with cinnamon and powdered sugar, Bougatsa is a traditional Greek pastry that adds a touch of bakery delight to your kitchen. This scrumptious dessert consists of crisp, buttery layers of phyllo dough enclosing a rich, creamy custard filling, producing a perfect contrast of textures in every bite.
## Reasons to Adore This Bougatsa
– **No Semolina Required**: This recipe utilizes common all-purpose flour to create a creamy, vanilla-infused custard.
– **Delightful Texture Variation**: The layers of buttery, golden phyllo encase a soft, sumptuous custard filling, presenting a wonderful mix of crisp and creamy textures.
– **Basic Pantry Components**: The filling is prepared with familiar items, including milk, eggs, flour, sugar, and vanilla.
## Ingredients for the Recipe
– **Whole Milk**: The foundation for the luscious custard filling.
– **Vanilla Extract**: Boosts and harmonizes the flavors.
– **Sugar**: Contributes sweetness to the custard.
## Preparing Bougatsa
### Step #1:
In a large bowl, combine the sugar, eggs, and all-purpose flour, whisking until mixed. Set aside.
### Step #2:
In a large saucepan over medium-high heat, add the whole milk and vanilla extract and bring to a boil.
### Step #3:
Once boiling, lower to a simmer and pour ⅓ of the hot milk mixture into the flour and egg mixture, whisking until blended.
### Step #4:
Return the combined mixture to the saucepan with the remaining milk and whisk until fully integrated. The custard should attain a thickness sufficient to coat the back of a spoon. Turn off the heat when this consistency is achieved.
### Step #5:
The creamy custard will keep thickening as it cools. Stir it every few minutes to avoid a skin forming on top.
### Step #6:
Preheat your oven to 325°F (163°C).
### Step #7:
With melted butter and a pastry brush, coat the bottom and sides of a 9 x 13 pan.
### Step #8:
Layer 6-8 sheets of phyllo dough in the pan, brushing melted butter over each sheet as you proceed.
### Step #9:
Pour the custard over the phyllo dough, spreading it out evenly.
### Step #10:
Continue layering 6-8 additional sheets of phyllo dough, brushing butter over each layer.
### Step #11:
Generously sprinkle the top layer with butter, then bake in the preheated oven for 40-50 minutes until the phyllo is crisp and golden brown.
### Step #12:
Let the Bougatsa cool before cutting into servings. Optionally, top with a light sprinkle of powdered sugar and cinnamon, and savor!
## Pro Tips
– **Keep the Phyllo Dough Covered**: Phyllo can dry out swiftly; keep unused sheets covered with plastic wrap or a damp kitchen towel.
– **Monitor the Pastry Color**: Look for a rich golden-brown hue for ideal crispness.
– **Allow the Bougatsa to Rest Before Cutting**: Let it cool for 20-30 minutes to ensure the custard sets properly.
## Frequently Asked Questions
**Is Bougatsa identical to Galaktoboureko?**
Both can contain phyllo dough and custard, but galaktoboureko is drenched in syrup post-baking, whereas Bougatsa is generally served without syrup.
**Is Bougatsa consumed warm or cold?**
It can be enjoyed warm or cold, but it’s best to allow it to cool sufficiently for clean slicing.
**Why is my Bougatsa mushy?**
Excess moisture or insufficiently baked phyllo can cause sogginess. Make sure the custard thickens correctly, use butter between layers, and bake until golden and crisp.
## Storage Guidelines
Store any leftovers in an airtight container in the refrigerator for 3-4 days. For extended storage, freeze leftovers for up to 2 months. Reheat in the oven at 350°F for 10-15 minutes or in the microwave until warmed through.
Bougatsa is a distinctive dessert that brings a flavor of Greece into your home, ideal for any occasion or merely as an enjoyable treat to savor.
Read More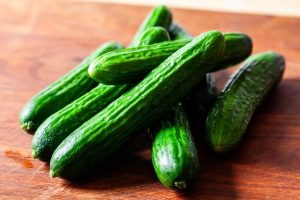
Cucumber Salad with Sesame Vinaigrette and Rice Vinegar
### Cucumber Salad with Sesame and Rice Vinegar
Cucumbers are a common ingredient in numerous kitchens, valued for their crunchy texture, invigorating flavor, and flexibility in various recipes. While they frequently appear at dinner tables, cucumber salads often do not get the recognition they deserve in recipe collections. This article offers a straightforward yet tasty cucumber salad recipe inspired by the Japanese dish known as *sunomono*, which translates to “vinegared items.”
#### The Charm of Cucumbers
Cucumbers are not only refreshing and budget-friendly but also versatile with an array of flavors and ingredients. They can serve as a snack, be included in salads, or accompany different meals as a side dish. Their crisp nature makes them especially attractive during warm weather, making this salad a perfect option for summer dining.
#### Recipe Summary
This cucumber salad is quick to make, needing just a few ingredients and little time. It’s ideal for weeknight meals, pairing well with stir-fries, noodle preparations, and potstickers. The recipe focuses on simplicity, allowing the inherent flavors of the cucumbers to come through.
#### Ingredients
– 1 pound (455 grams) Persian-style cucumbers, trimmed and cut into 1/2-inch pieces
– 1 1/2 teaspoons kosher salt (Diamond brand advised)
– 3 tablespoons (45 ml) unseasoned rice vinegar
– 1 tablespoon (15 ml) toasted sesame oil
– 1 tablespoon (15 ml) soy sauce
– Ground black or white pepper, to preference
– Chili oil or chili crisp, to preference, or red pepper flakes
– Toasted sesame seeds, for garnish
#### Directions
1. **Prepare the Cucumbers**: In a bowl, mix the sliced cucumbers with kosher salt. Let them rest for at least 10 to 15 minutes, or for up to an hour or two. This step removes excess moisture, enriching the flavor of the salad.
2. **Combine the Dressing**: Once the cucumbers have been set aside, discard any surplus liquid. Add rice vinegar, sesame oil, soy sauce, and ground pepper to the cucumbers. Stir thoroughly to blend all the components.
3. **Final Adjustments**: Modify the seasoning with extra salt if needed. Complete the salad with a drizzle of chili oil or a dusting of red pepper flakes for spice, and sprinkle with toasted sesame seeds.
4. **Serving Recommendations**: Chill the salad in the refrigerator until it’s time to serve. It can be enjoyed right away or stored in the fridge for 2 to 3 days, during which it will acquire a subtly pickled taste.
#### Closing Thoughts
This cucumber salad with sesame and rice vinegar offers a revitalizing touch to any meal. Its straightforwardness and adaptability make it an essential recipe for hectic weeknights. Whether enjoyed next to a main dish or by itself, this salad is bound to delight.
Read More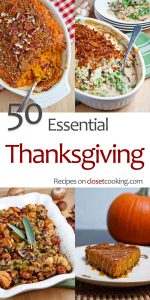
A Complete Handbook to 50 Vital Thanksgiving Dishes
**The 50 Best Recipes for an Unforgettable Thanksgiving Feast**
Thanksgiving is a time for family gatherings, appreciation, and, naturally, exquisite cuisine. Regardless of whether you’re celebrating in Canada or the U.S., organizing a Thanksgiving feast can be both thrilling and challenging. To assist you in putting together an unforgettable banquet, here’s an extensive guide featuring 50 best recipes that encompass everything from breakfast through to dessert.
**Breakfast/Brunch:**
1. Pumpkin Spice Pancakes
2. Sweet Potato Hash with Eggs
3. Cranberry Orange Scones
4. Apple Cinnamon French Toast Casserole
5. Maple Pecan Granola with Yogurt
**Snacks/Appetizers:**
6. Stuffed Mushrooms with Sausage
7. Cranberry Brie Bites
8. Roasted Pumpkin Seeds
9. Spinach Artichoke Dip
10. Cheese and Charcuterie Board
**Main Course:**
11. Classic Roast Turkey
12. Herb Butter Turkey Breast
13. Honey Glazed Ham
14. Vegetarian Stuffed Acorn Squash
15. Garlic Herb Prime Rib
**Side Dishes:**
16. Traditional Stuffing
17. Garlic Mashed Potatoes
18. Sweet Potato Casserole with Marshmallows
19. Green Bean Casserole
20. Roasted Brussels Sprouts with Bacon
21. Cranberry Sauce
22. Cornbread
23. Maple Glazed Carrots
24. Creamed Spinach
25. Wild Rice Pilaf
**Desserts:**
26. Classic Pumpkin Pie
27. Pecan Pie
28. Apple Crisp
29. Chocolate Bourbon Pecan Pie
30. Cranberry Cheesecake
31. Sweet Potato Pie
32. Pumpkin Roll
33. Pear and Almond Tart
34. Chocolate Mousse
35. Bread Pudding with Caramel Sauce
**Leftover Ideas:**
36. Turkey and Cranberry Sandwich
37. Thanksgiving Leftover Casserole
38. Turkey Pot Pie
39. Stuffing Waffles
40. Sweet Potato Pancakes
**Time-Saving Tips:**
41. Prepare desserts a few days ahead.
42. Make cranberry sauce and casseroles the day prior.
43. Use a slow cooker for mashed potatoes or casseroles.
44. Choose one oven-baked casserole and prepare it once the turkey is finished.
45. Utilize a pressure cooker for speedy cooking.
**Additional Recipes:**
46. Butternut Squash Soup
47. Deviled Eggs
48. Roasted Garlic Cauliflower
49. Corn Pudding
50. Chocolate Pumpkin Bread
Thanksgiving is a day to cherish with those dear to you, and with proper planning, you can guarantee a hassle-free and delightful celebration. From hearty breakfasts to decadent desserts, these recipes will aid you in creating a Thanksgiving meal that will be cherished by all. Happy cooking!
Read More